Plex를 설정하는 방법 (및 모든 장치에서 영화보기)

Plex Media Server는 모든 영화, 프로그램 및 기타 미디어를 한 곳에 저장하고 집에 있든 이동 중이 든 모든 장치에서 액세스 할 수있는 사용자 친화적 인 방법입니다. 어디에서나 영화를 볼 수있는 두통없는 방법을 찾고 있다면 바로 이것이다.
Plex Media Server 란 무엇입니까?
여기에 너무 많은 사람들이 처한 일반적인 상황이 있습니다. 음악, 영화, TV 쇼, 사진 등 미디어 파일이 있지만 풍부하고 다양한 장치에서 쉽게 액세스 할 수있는 방법이 없습니다.
Blu-ray 립을 랩톱으로 복사합니까? 휴대 전화는 어떻습니까? 파일을 더 작고 호환되도록 변환합니까? 데스크톱과 Chromecast를 통해 TV로 쇼를 보내나요? 모든 사진을 iCloud 계정에 업로드하여 Apple TV를 통해 TV로 전송합니까? 당신의 음악은 어떻습니까? 출장으로 집을 비우고 TV 프로그램을 iPad로 스트리밍하려면 어떻게해야합니까?
미디어 관리 경험이 많은 진지한 괴짜에게도 모든 장치가 동일한 컬렉션에 액세스하고 액세스하도록 만드는 것은 큰 고통입니다. 그래도 그럴 필요 는 없습니다 . Plex는 대규모 개인 미디어 컬렉션을 관리하는 동안 발생하는 거의 모든 문제를 제거하는 중앙 집중식 미디어 서버 시스템입니다.
Plex 모델은 간단합니다. Plex 서버 소프트웨어가 설치된 단일 컴퓨터에 모든 미디어를 파킹 한 다음 다른 모든 장치에 Plex를 설치합니다. Windows, Linux 또는 Mac 컴퓨터뿐만 아니라 Android 및 iOS, Xbox 및 PlayStation과 같은 비디오 게임 콘솔, Apple TV에 설치할 수 있으며 Plex가 내장 된 스마트 TV도 있습니다. 이러한 장치를 사용하면 전체 미디어 라이브러리에 원격으로 액세스하여 번거 로움없이 시청할 수 있습니다.

또한 Plex 모델은 서버 / 클라이언트 모델이므로 다양한 장치에 파일을 복사하고 재생 품질, 비디오 해상도 및 기타 세부 사항과 같은 문제를 처리하는 것에 대해 걱정할 필요가 없습니다. Plex 서버는 모든 미디어 콘텐츠를 즉시 트랜스 코딩하여 사용중인 모든 장치에서 제대로 재생되도록합니다. iPhone의 뒷마당에서 TV 쇼를보고 싶으십니까? 문제 없어요. 친척 집에서 노트북으로보고 싶으세요? 또한 문제 없습니다. 추가 하드웨어없이 새로운 스마트 TV를 미디어 컬렉션에 바로 연결하고 싶으십니까? 올바른 TV를 구입해도 문제 없습니다. 간단히 말해, Plex를 실행하는 것은 라이브러리를 큐레이팅하는 자신의 개인적이고 세련된 스트리밍 서비스를 실행하는 것과 같습니다.
꽤 멋지죠? 모든 장치에 온 디맨드 스트리밍을 제공 할뿐만 아니라 그와 함께 사용할 수있는 절대적으로 아름다운 메타 데이터와 아트를 얻을 수 있습니다.

시작하는 데 필요한 사항을 자세히 살펴본 다음 Plex 용 미디어 컬렉션 준비, Plex 설치 및 Plex 미디어 컬렉션에 액세스하는 모든 사람이 가장 좋아하는 부분으로 바로 이동하겠습니다.
필요한 것
Plex는 정말 세련된 제품이며 일단 설치하고 실행하면 두통이 없습니다. 그러나 가장 중요한 것은 필요한 사항과 Plex 설정의 모든 부분이 함께 작동하는 방식에 대한 명확한 그림으로 경험에 들어가는 것입니다.
가정은 서버가있는 곳
무엇보다도 모든 파일을 보관하고 Plex Media Server를 실행하는 컴퓨터가 필요합니다. Windows, Linux, OS X 및 FreeNAS와 같은 전용 서버 소프트웨어 및 Synology 시스템과 같은 NAS 하드웨어에도 Plex를 설치할 수 있습니다 (여기에서 미디어 서버 앱에 대해 지원되는 모든 플랫폼을 볼 수 있습니다). 하지만 어떤 플랫폼을 선택하든 항상 켜져있는 컴퓨터 여야합니다. 콘텐츠에 액세스 할 때 콘텐츠가 오프라인 상태 인 경우 모든 개인 미디어 요구 사항에 대한 포괄적 인 스트리밍 솔루션을 사용할 필요가 없습니다.
항상 켜져있는 것 외에도 서버 컴퓨터가 앞서 언급 한 트랜스 코딩을 처리 할 수있는 적절한 처리 능력을 갖기를 원할 것입니다. 한 번에 시청할 사용자가 많을수록 원하는 하드웨어가 더 좋아집니다. Plex 미디어 서버는 여전히 오래된 하드웨어에서 작동하지만 하드웨어가 충분하지 않으면 자동으로 트랜스 코딩을 비활성화하고 실제로 오래되거나 전력이 부족한 하드웨어에서 재생이 중단되고 끊깁니다.
그래서, 당신은 당신이 여분으로 할 수있는 한 CPU를 원할 것입니다. Plex는 최소 2GB의 RAM이있는 Intel i3 프로세서 (또는 이와 동등한 프로세서) 이상을 권장합니다 (RAM은 Plex에 특히 중요하지 않음). 여기에서 하드웨어 권장 사항을 읽을 수 있습니다.
마지막으로, 가지고있는 모든 영화, TV 프로그램, 음악 및 사진을 저장할 수있는 충분한 하드 드라이브 공간이 필요합니다.
이미 사용하지 않는 하드웨어가 주변에 놓여 있다면 꼭 한번 시도해보십시오. 최악의 시나리오는 파일 재생이 만족스럽지 않다는 것입니다. 최상의 시나리오는 이전 하드웨어가 제대로 작동하고 새 장비를 구입하지 않는 것입니다.
여기에서 서버 소프트웨어에 사용 가능한 플랫폼을 확인할 수 있습니다.
모든 장치를위한 클라이언트
서버는 Plex 시스템의 절반에 불과합니다. 나머지 절반은 "클라이언트"앱 또는 모든 시청을 수행하는 앱입니다. 서버의 웹 기반 제어판에서 미디어를 재생할 수 있지만 웹 브라우저에서 Netflix를 시청하는 것과 비슷합니다. 대부분의 사람들은 거실에 앉아 있거나 모바일 장치에서 시청하는 것을 선호합니다. 이를 위해 서버에 액세스하려면 Plex 클라이언트가 필요합니다.

Android, iOS, Windows Phone, Apple TV, Roku 등 상상할 수있는 거의 모든 플랫폼 용 Plex 앱을 찾을 수 있습니다. Plex에 대한 끊임없는 혼란의 원인이 된 한 가지는 무료인지 여부입니다. 이러한 혼란의 상당 부분은 모바일 앱에 "활성화 요금"이 있다는 사실에 달려 있습니다.
Plex 미디어 서버 소프트웨어는 항상 무료였습니다. 대부분의 클라이언트 앱은 항상 무료였습니다. 일부 클라이언트 앱은 명목상의 일회성 등록비가 몇 달러 있습니다 (예 : iOS Plex 클라이언트 앱의 가격은 $ 4.99).
Plex에는 유료 앱을 처리하는 두 가지 방법이 있습니다. 하나의 앱만 필요한 경우 해당 단일 앱만 활성화 할 수 있습니다. 다른 옵션은 모든 유료 앱에 대한 액세스와 오프라인 액세스 및 클라우드 기반 파일 저장을 위해 모바일 장치에 동기화하는 것과 같은 혜택을 모두 제공하는 구독 서비스와 같은 Plex Pass를 구입하는 것입니다. 여러 플랫폼에서 다양한 애플리케이션을해야하는 경우 와 는 프리미엄 기능을 원하는, 당신은 $ 4.99 달 또는 $ 149.99 평생 패스의 패스 가입을 고려해 볼 수 있습니다.
유료 앱, 무료 앱, 무료 Plex 멤버십과 프리미엄 멤버십의 차이점에 대한 자세한 내용은 여기에서 확인할 수 있습니다. 플랫폼 가용성을 확인하고 플랫폼 용 클라이언트 앱을 다운로드하려면 여기에서 Plex 다운로드 페이지를 확인하십시오.
이제 Plex 서버용 장치 선택에 대한 일반적인 지침과 클라이언트 소프트웨어를 얻는 방법을 살펴 보았으므로 미디어를 구성하는 중요한 단계를 살펴 보겠습니다.
1 단계 : 미디어 통합 및 구성
Plex는 모든 미디어 콘텐츠가 잘 구성되고 동일한 위치에있을 때 가장 잘 작동합니다. 이를 위해 Plex 서버 소프트웨어를 설치하는 동일한 장치에 모든 미디어가 있어야합니다. 이전 데스크톱 컴퓨터, 지하실의 전용 스토리지 서버 또는 NAS 장치이든 모든 미디어가 여기에 있어야합니다. .
또한 주요 미디어 유형을 분리하고 사용자와 Plex가 쉽게 구문 분석 할 수있는 깨끗한 폴더 구조로 미디어를 구성하려고합니다.
미디어 구성에 이미 시간을 투자 한 적이있는 경우, 특히 과거에 XBMC / Kodi와 같은 미디어 센터 소프트웨어를 사용한 적이 있다면 이미 완벽한 (또는 거의 완벽한) 폴더 구조를 가지고있을 가능성이 높습니다. 장소.
다음은 Plex에 대한 모범 사례 디렉터리 구조의 간단한 예입니다.
/ Media / / Movies / / MovieName (연도) / MovieName (연도) .ext / Music / / ArtistName-AlbumName / Track #-TrackName.ext / TV Shows / / ShowName / / Season 01 / ShowName-s01e01.ext / Photos / / 앨범 이름 / Image.ext
위의 디렉토리 구조에서 주요 미디어 카테고리가 별개의 하위 폴더 (예 : 영화 및 TV 쇼)로 분리되어 있고 각 미디어 유형에 매우 간단한 명명 규칙이 있음을 알 수 있습니다. 영화는 영화 이름을 딴 폴더에 들어갑니다. 가장 좋은 방법은 혼란을 줄이기 위해 괄호 안에 연도를 포함하는 것입니다. 음악은 곧바로 아티스트 이름 / 앨범 이름 형식으로 구성됩니다. TV 프로그램은 이름, 시즌별로 구성되며 에피소드는 "sXXeXX"형식의 두 통계로 태그가 지정됩니다. 사진은 훨씬 더 쉬워졌습니다. Plex는 폴더에서 앨범 이름을 읽고 안에있는 이미지를로드합니다.
While the above examples cover pretty much 99% of the territory you may find you need a little extra guidance when naming DVD .ISO files or other less common formats. If you need additional help cleaning up your media check out the Plex guide to media preparation here. (Update: This guide has vanished from Plex’s current website, but the link we provide will take you to an archived version of the guide.)
A final note on organizing your media for Plex: if you’ve used or are currently using another media center software (like XBMC), don’t worry about your metadata. You can safely run XBMC and Plex completely in parallel with no risk to your metadata, as neither application uses the same metadata files.
Step Two: Install Plex Media Server
The foundation of the setup, beautifully organized media aside, is the Plex Media Server application. For our tutorial today we’ll be installing it on a Windows machine but, small nuances aside, the installation process is practically identical across all platforms as the majority of the process is done from within the Plex web-based control panel.

Head over to the downloads page and grab a copy of Plex Media Server for your platform. Run the installer and relax for a minute. When the installer is complete, Plex will automatically launch, and should load the web control panel for you. If it does not, open your web browser and navigate to //127.0.0.1:32400/ on that computer. (Alternatively, you can access it from another computer on your network by replacing the 127.0.0.1 address with the local network IP address of your computer or NAS device).
After accepting the user agreement, you’ll be prompted to sign into your Plex account. On the off chance that you have an old Plex account from previous experiments with the platform, sign in. Otherwise, click on the “Sign Up” link and sign up for a new account.

After your first sign in, you’ll get a rundown of all the features of the Plex Pass premium service. While we happen to think the premium service is pretty great, let’s not get ahead of ourselves–use Plex for awhile to determine if you want to invest in it. Close out the popup window to return to the server setup.
The first step is to name your server. By default, the server is named after the network name of the machine upon which it is installed. You can change the server name to something more exciting than say “Dad Office” or leave it as is.

Next, it’s time to add media to our library. Select “Add Library”.

Here you can add many different library types: movies, TV shows, music, photos, and home videos.

Let’s start off by adding some movie files. Select “Movies” and then, in the drop down menu that appears, name your movie library and select a language. For most people leaving the default name of “Movies” should suffice. Click “Next”.

Now it’s time to point Plex at the actual files, select “Browse for media folder” and select the folder that houses your movie files. Once you’ve selected the folder(s), click “Add library” to complete the process.

Repeat these steps for TV shows, music, and/or photos. It isn’t necessary to populate all the libraries, ofo course–if you’re using Plex solely for TV shows, then go ahead and ignore all the other library entries.
The final step of the initial server setup is to allow remote access to your media server and send anonymous data to Plex. Both are checked by default, and we recommend you leave them checked unless you have a pressing reason to uncheck them. Select “Done”.

At this point you’ll be kicked into the web-based control panel for your Plex server. Depending on how quickly your machine is working, you may see “Updating libraries…” or you may already have content to display like this.

Note, for the first few hours or even for the first day, the “recently added” section isn’t particularly useful as everything was recently added to the library. Things will calm down shortly and recently added will become useful again over the coming days.
While you can browse through all your media libraries right from the Plex control panel (and even watch content right in the web browser), it’s more useful for checking in on your library and less useful for actually enjoying your content. Let’s look at how you can access Plex with a remote client.
Step Three: Access Your Plex Media Server from Elsewhere
At this point we’ve done all the hard work (and it wasn’t even that hard). Once you have the actual Plex media server up and running, it’s totally smooth sailing. How smooth? Because your entire library is stored on one central server, you can easily tap into it from any computer, smartphone, or other device and get the exact same experience–the same media, same meta data, same recently added list, same database tracking what shows you’ve watched and which ones you need to catch up on.
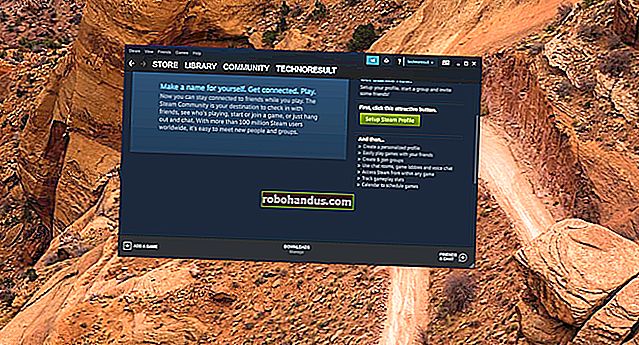
Search for the app in your phone/tablet/TV’s app store, install it, and launch it. Again, we’re using the iOS app, but they’re all essentially interchangeable. Click “Sign In” and use the same credentials you created when you set up your server.

Boom. You are instantly connected to your media collection. Do you see how the screen on our iPhone mirrors, down to the show titles, the screenshot you just saw of the media server control panel?

That’s Plex’s strongest element right there: centralization makes everything run so smoothly. If we tap on the “Browse” button, seen in the lower right corner of the screenshot above, we can then select from our available media. Let’s do that and then select “TV shows”.

How about some Family Guy? Why not, we’ll select a season and an episode.

With but a few taps after logging in, we’re watching an episode without a hiccup:

And that’s all there is to it! If you have local media and a desire to watch that local media anywhere in your house (or even away from home) and on any device, Plex Media Center is an all-in-one solution that makes enjoying your movies, TV shows, and even family photos and videos, an absolute breeze.